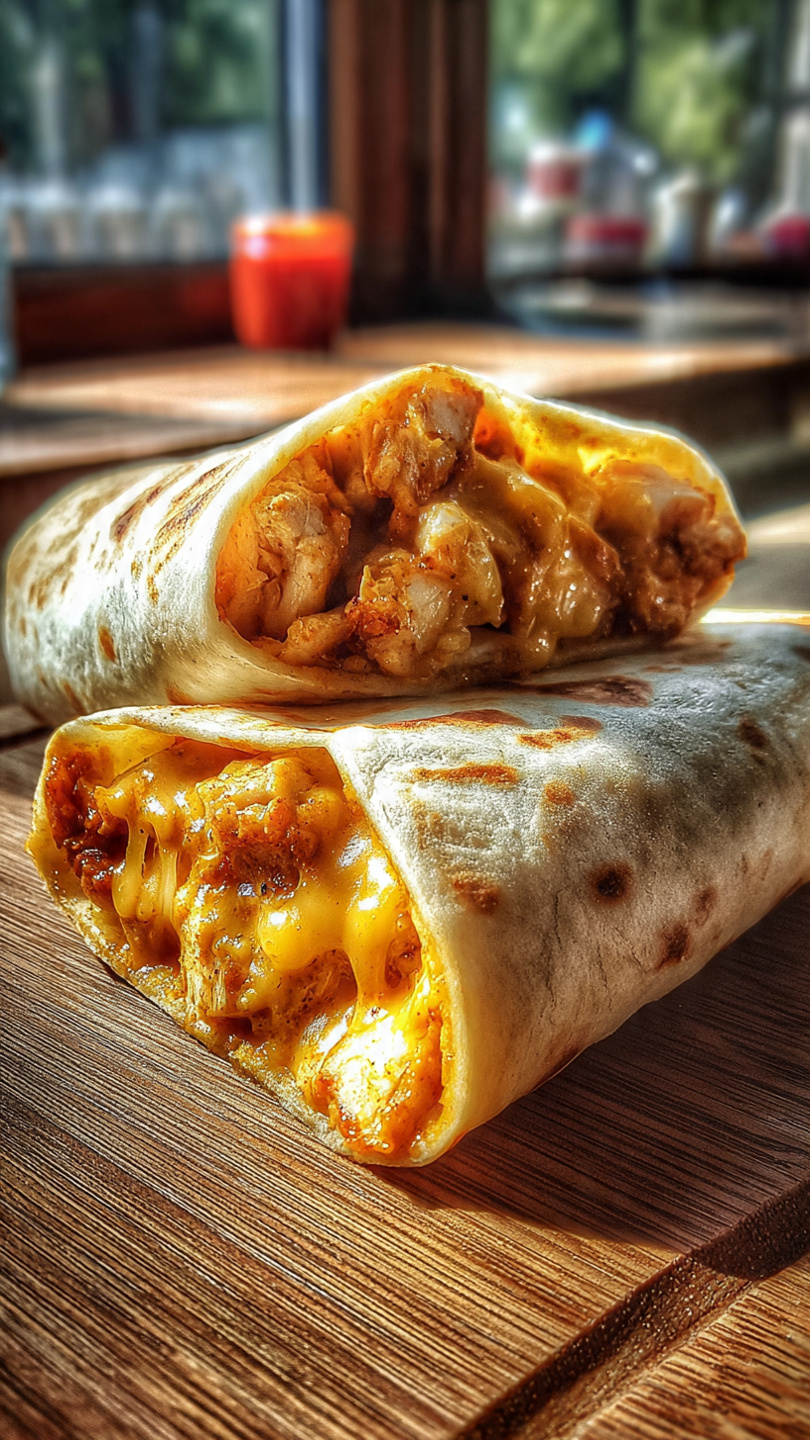
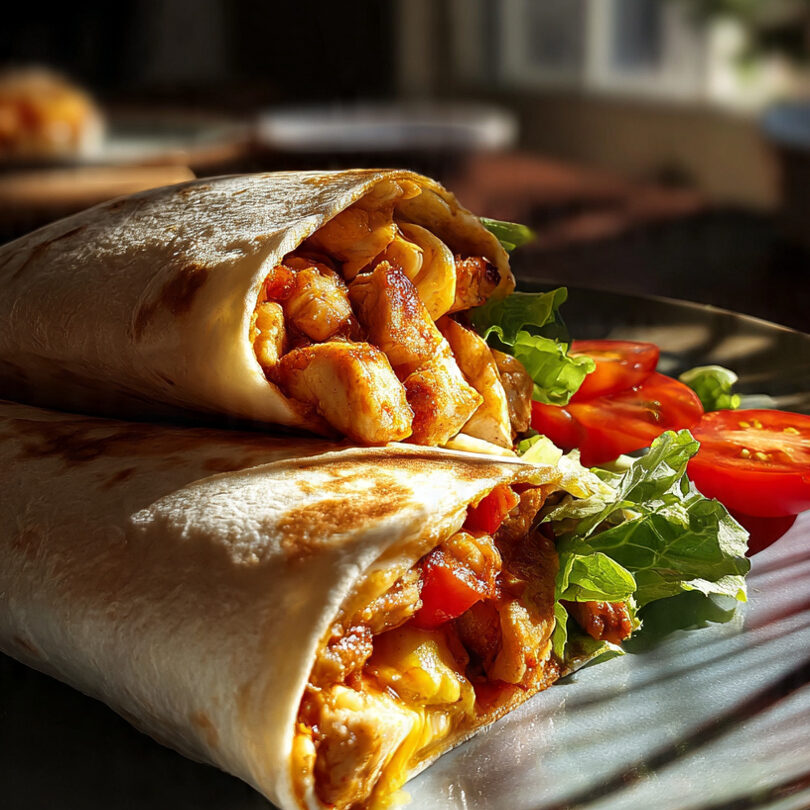
If you’re searching for yummy easy dinner recipes that come together fast and satisfy everyone at the table, these Cheesy Garlic Chicken Wraps are exactly what you need. Loaded with juicy garlic-seasoned chicken, melty cheese, and wrapped in a golden crispy tortilla, this recipe checks every box for comfort food recipes, lazy dinners, and simple healthy dinner ideas.
This wrap is perfect when you want something better than a sandwich but easier than a casserole. Using cooked chicken breast or chicken tenderloin recipes, this meal is ready in under 30 minutes and makes a fantastic option for busy weeknights.
Roadmap for This Recipe
Here’s what you’ll find in this guide:
- Why You’ll Love These Cheesy Garlic Chicken Wraps
- Ingredients You Need
- How to Make Cheesy Garlic Chicken Wraps (Step-by-Step)
- Tips for the Crispiest Wraps
- Easy Variations and Add-Ins
- How to Store and Reheat
- What to Serve with Chicken Wraps
- FAQs
- WPRM Recipe Card
Why You’ll Love These Cheesy Garlic Chicken Wraps
- Ready in just 30 minutes
- Uses simple pantry ingredients
- Perfect for chicken recipes for dinner
- Crispy outside, cheesy inside
- Great for meal prep and leftovers
- Family-friendly and kid-approved
- Works with leftover chicken or rotisserie chicken
This recipe fits right into your collection of food recipes for dinner when you want something fast but still homemade and satisfying.
Ingredients You Need
To make these cheesy wraps, you only need a few basic ingredients:
- Cooked chicken breast or tenderloins
- Garlic
- Olive oil and butter
- Paprika and Italian seasoning
- Salt and pepper
- Mozzarella cheese
- Cheddar cheese
- Flour tortillas
- Fresh parsley (optional)
These everyday ingredients turn into a flavorful wrap that tastes like something from a café.

How to Make Cheesy Garlic Chicken Wraps (Step-by-Step)
Step 1: Season the Chicken
Heat olive oil in a skillet. Add minced garlic and sauté briefly until fragrant. Add the diced chicken, paprika, Italian seasoning, salt, and pepper. Stir well to coat the chicken in garlic flavor.
Step 2: Add Butter for Flavor
Stir in a little butter. This gives the chicken a rich, glossy coating and deepens the garlic flavor.
Step 3: Assemble the Wraps
Lay tortillas flat. Add the garlic chicken mixture to the center, then top with a generous amount of mozzarella and cheddar cheese.
Step 4: Fold and Roll
Fold in the sides and roll tightly into a wrap so the cheese stays inside while cooking.
Step 5: Crisp the Wraps
Place the wraps seam-side down into a hot skillet. Cook until golden brown and crispy on both sides and the cheese is fully melted.
Slice and garnish with parsley before serving.
Tips for the Crispiest Wraps
- Use medium heat so the tortilla crisps without burning
- Don’t overfill the wraps
- Press gently with a spatula while cooking for even browning
- Use freshly shredded cheese for the best melt
- Let the wraps rest for 1 minute before slicing
These small tips make a big difference in texture.
Easy Variations and Add-Ins
This recipe is very flexible and works well with additions:
- Add sautéed onions and peppers
- Drizzle with honey garlic chicken sauce
- Add a spoon of cream cheese for extra creaminess
- Use pepper jack for a spicy kick
- Add spinach for a healthier twist
You can easily turn this into one of your favorite chicken casserole recipes by slicing the wraps and baking them with extra cheese on top.
How to Store and Reheat
These wraps are perfect for meal prep.
To store:
Place wraps in an airtight container in the fridge for up to 3 days.
To reheat:
Reheat in a skillet or air fryer to bring back the crispiness. Avoid microwaving if possible, as it softens the tortilla.
What to Serve with Chicken Wraps
Pair these wraps with:
- French fries or potato wedges
- A fresh green salad
- Coleslaw
- Tomato soup
- Garlic dipping sauce or ranch
This makes a complete and satisfying dinner.
FAQs
Can I use raw chicken?
Yes. Dice and cook it fully with the garlic and seasoning before assembling the wraps.
Can I make this recipe ahead of time?
Yes. Assemble the wraps and cook them when ready to eat.
Can I freeze these wraps?
It’s best to freeze before cooking. Thaw and then crisp in a skillet.
What tortillas work best?
Large flour tortillas work best for wrapping and crisping.
Final Thoughts
These Cheesy Garlic Chicken Wraps are the definition of lazy dinners done right. Crispy, cheesy, garlicky, and satisfying, this recipe belongs in every collection of simple healthy dinner ideas and chicken recipes for dinner. Once you try them, they’ll quickly become a regular part of your weekly meal rotation.
Cheesy Garlic Chicken Wraps
Ingredients
Method
- Heat olive oil in a skillet over medium heat.
- Add garlic and sauté for 30 seconds.
- Add chicken, paprika, Italian seasoning, salt, and pepper. Cook 3–4 minutes.
- Stir in butter and remove from heat.
- Add chicken and cheese to tortillas.
- Roll into wraps.
- Cook in a skillet until golden and crispy on both sides.
- Slice, garnish, and serve warm.